Video Editing for Beginners: Easy Tips to Get Started
Video editing is really just about telling a good story. It's easy to get bogged down by all the complicated software and technical jargon, but the truth is, you just need a simple tool and a good handle on the basics—like making simple cuts and organizing your clips—to create something compelling.
Getting Started Without Getting Overwhelmed
Jumping into video editing for the first time can feel like you've been handed the keys to a spaceship. There are a thousand buttons, and it's totally intimidating. But here's the good news: you only need to know what a handful of them do to get flying.
At its heart, video editing is the art of selection. You're simply picking the best moments from all the footage you've shot and arranging them in a way that creates an engaging story. It’s less about technical wizardry and more about finding a good rhythm. Think of your raw clips as a pile of sentences; your job is to put them together to form a clear, coherent paragraph.
Choosing Your First Editing Tool
Your software is your creative workshop, but you absolutely do not need the most expensive one to build something great. While the industry is booming—projections show premium software users could hit 48.22 million by 2025—many of the best tools for someone just starting out are completely free.
To help you navigate the options, here’s a quick look at what's out there.
Comparing Popular Video Editing Software for Beginners
Choosing the right tool can make all the difference when you're starting out. To give you a clearer picture, here’s a comparison of a few popular choices that are well-suited for beginners.
SoftwarePricing ModelBest ForKey StrengthsDaVinci ResolveFree (with a paid Studio version)Aspiring filmmakers who want to grow into a professional tool.Unbeatable colour grading, powerful audio tools, and a full suite of pro features in the free version.Adobe Premiere ProSubscription-basedContent creators and professionals needing a seamless workflow with other Adobe apps.Industry-standard, vast library of tutorials, and excellent integration with After Effects and Photoshop.iMovieFree (on Apple devices)Absolute beginners and hobbyists looking for a simple, intuitive experience.Incredibly easy to learn, clean interface, and perfect for basic projects without a steep learning curve.
Ultimately, the best choice depends on your goals and your budget. Don't be afraid to try the free options first to get a feel for the process before committing to a paid subscription.
For a more detailed comparison, you can explore our full guide on the best video editing software for beginners.
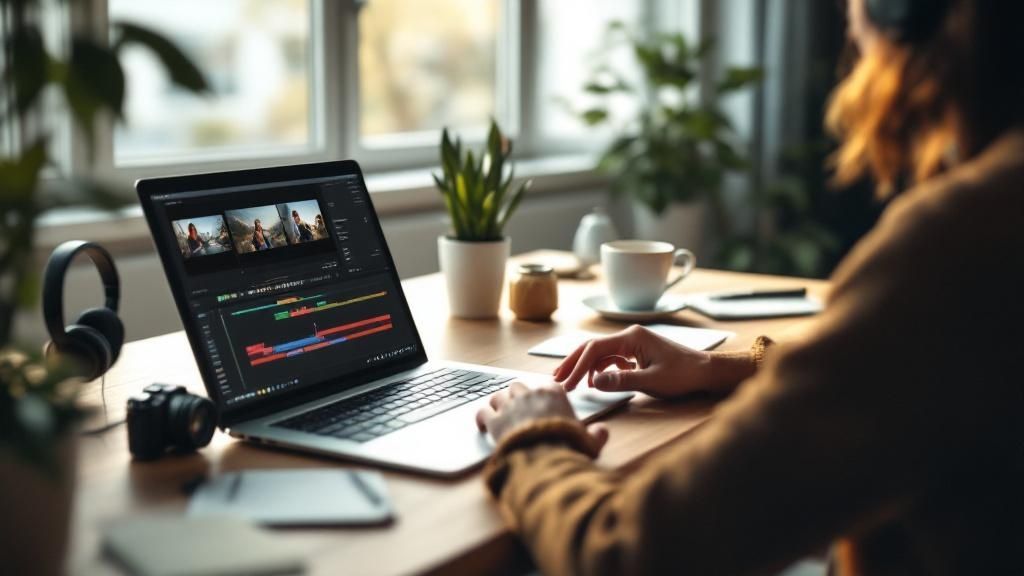
Below is a look at the interface for DaVinci Resolve, a fantastic free option that packs a professional punch.

See how it's broken down into logical sections for media, cutting, effects, and audio? This kind of layout is designed to help you focus on one part of the process at a time, which is a lifesaver when you're just getting your bearings.
Understanding The Core Workflow
No matter which program you end up using, the fundamental process is pretty much the same everywhere. You'll import your footage, trim your clips, arrange them on a timeline, and then export the final product.
The real magic—and where you'll spend most of your time—happens during the actual editing. This is where you bring your story to life, piece by piece.
The secret to great beginner video editing isn't flashy transitions or complex effects. It's making clean cuts, ensuring your audio is clear, and telling a story that flows logically from start to finish.
If you're looking for more practical advice on how to handle your footage, check out these essential video editing tips for beginners. It's a great resource that builds on the foundational skills we're talking about here.
Getting Your First Editing Project Organized

Before you ever lay a clip on the timeline, the most important work begins. A chaotic project file is the fastest way to kill your creative momentum and turn editing into a frustrating slog. I can't tell you how many hours I've seen beginners lose just searching for a file.
Taking a few minutes to set up a solid foundation is the secret weapon of every efficient editor. Think of it like a chef prepping their ingredients before they start cooking—everything is easier and faster when you know exactly where to find what you need. This isn't just about being tidy; it's about building a logical, stress-free workspace.
Create a Home for Your Project
First things first, before you even open your editing software, make a single master folder for your project. Whether it’s on your computer’s hard drive or an external one, this folder will be the central hub for every single file related to your video.
Inside that main folder, immediately create a set of subfolders. This simple act will save you from countless headaches later. A great starting structure looks like this:
- Video: All your raw camera footage goes in here. No exceptions.
- Audio: This is for any external audio recordings (like from a separate mic), sound effects, and music tracks.
- Graphics: Put your logos, lower-third titles, photos, and any other visual elements here.
- Project Files: This one is crucial. It’s only for the save files your editing software creates.
Getting into this habit is the best way to avoid the dreaded "media offline" error that pops up when your editing software loses track of a file you've moved. When everything lives in one self-contained master folder, your project becomes portable and much more stable.
Import Your Media into Bins
Once your folders are set up on your drive, it's time to bring everything into your editing software. The worst thing you can do is just dump all your files into the media pool. Instead, you're going to mirror the folder structure you just created by using what are called bins.
Bins are basically just folders inside your editing project.
Create a bin for "Video," another for "Audio," one for "Graphics," and so on. This keeps your project panel clean and lets you find a specific shot or sound effect in seconds instead of scrolling through a massive list of cryptic file names.
A well-organized project is a happy project. When you can find what you need without thinking, you stay in the creative flow and focus on what truly matters: telling your story.
Let's say you're cutting a travel vlog. You can take this a step further by creating sub-bins inside your main "Video" bin. Maybe you have one for "Beach Footage," another for "City B-Roll," and a third for "Drone Clips." This level of detail is what separates beginners from pros and makes the entire process smoother and genuinely more enjoyable.
Understanding the Timeline
With all your media neatly sorted, you're ready to start building your story on the timeline. The timeline is the heart of your edit. It's a visual, left-to-right representation of your video from start to finish. You’ll drag clips from your bins down onto the timeline to start piecing them together.
You'll see the timeline is made up of horizontal layers called tracks. Video tracks are usually stacked on top, with audio tracks sitting below. Placing clips next to each other makes them play one after the other. Stacking them vertically lets you layer them. For example, if you put a logo on a video track above your main interview clip, the logo will appear on top of the person speaking. This simple, visual layout is the foundation of all non-linear video editing.
Making Cuts, Transitions, and Simple Effects
https://www.youtube.com/embed/y7Ci_H9bYEk
Now that your project is nicely organized, we get to the fun part—the actual edit. This is where you take a pile of raw footage and start shaping it into a story. Every single cut, transition, and effect you choose should be deliberate. It’s all about serving the narrative.
Think of yourself less like a technician and more like a storyteller. Your real job is to guide the viewer’s eye and control the video’s pace. The most powerful tool in your arsenal for doing this is the simple cut.
The Power of the Cut
A "cut" is just that—the point where one clip stops and the next one starts. It sounds almost too simple to be important, but the timing of your cuts is what dictates the entire rhythm of your video.
Let's say you're editing a travel vlog. If you string together a rapid-fire sequence of one-second clips from a chaotic street market, you create a feeling of high energy and excitement. On the other hand, if you let a gorgeous, serene landscape shot linger for a full ten seconds before cutting, you evoke a sense of calm and awe. There's no single right answer; it's all about the choice that best tells your story at that moment.
The real art of editing isn’t just knowing where to cut, but why. With every single edit, ask yourself: "What feeling am I trying to create for the viewer right now?" This one question will guide your decisions better than any technical rulebook ever could.
The first practical step is always to trim the "fat" from your clips. Get rid of the shaky start before the action begins and the awkward moment after it ends. Once you've done that, start playing with the timing. See how a scene feels if you cut away a split second earlier. Or later. This is how you start to build an editor's intuition.
Choosing the Right Transition
While a straight cut is your go-to, transitions can help you smoothly bridge the gap between different scenes or ideas. A word of warning: beginners have a tendency to go wild with flashy effects like star wipes and page peels. In professional editing, less is almost always more.
For most of your work, you'll only ever need three fundamental transitions:
- Hard Cut: This is your default. One clip instantly replaces the next. You should be using this 95% of the time. It keeps your edit clean, professional, and moving forward.
- Dissolve (or Crossfade): Here, one clip gently fades out as the next one fades in. A dissolve is a great visual shorthand for a passage of time or a change in location. Think of moving from a morning scene to an evening one.
- Fade to/from Black: Fading out to a black screen creates a strong sense of finality, like the end of a chapter in a book. Fading in from black is a classic, powerful way to open a video or introduce a major new section.
Stick to these three, and your videos will immediately look more polished and intentional.
Adding Simple, Impactful Effects
Effects are like salt in cooking—a little goes a long way. Instead of burying your footage under filters, let's focus on two foundational enhancements that will make a massive difference.
Basic Colour Correction
Cameras don't always capture colour the way our eyes do. A quick colour correction can make your footage come alive. You'll want to get comfortable with three main adjustments:
- Exposure: This just makes the image brighter or darker.
- Contrast: This adjusts the difference between the light and dark parts of the image, making it look less flat and more dynamic.
- Saturation: This boosts the intensity of the colours, making them more vibrant and rich.
Video Stabilization
No matter how steady you think your hands are, you're going to end up with some shaky footage. It's just a fact of life. Thankfully, most editing software has a built-in stabilization tool that can smooth out those minor jitters, making your shots look far more professional. I recommend applying it to any handheld clips that feel a bit distracting.
Getting a handle on these skills is more important than ever. In places like California, the production industry is leaning into longer, more immersive stories, which requires a solid grasp of these core techniques. If you're interested in where things are headed, you can read more about how California's video production trends are shaping the industry for 2025. Mastering these basics really does set a powerful foundation for everything you'll do next.
Working with Audio, Music, and Sound Design

There’s an old saying in the film world that audio is 50% of the video experience, and I can tell you from experience, it’s absolutely true. You can pour your heart into shooting stunning visuals, but if the sound is tinny, muffled, or distracting, your audience will click away in a heartbeat. Great audio doesn’t just support your video; it brings it to life.
I like to think of a video's sound as having three main layers: the dialogue, the music, and the sound effects (SFX). The real art is in blending them together so they work in harmony. And in that harmony, the dialogue must always be the star. If your viewers can't make out what people are saying, the story is lost.
Balancing Dialogue and Music
One of the most common rookie mistakes I see is letting the background music drown out the dialogue. It's a tricky balance to get right. You need that music to create a mood and drive emotion, but the moment it competes with the spoken word, you’ve got a problem.
This is where a technique called audio ducking becomes your best friend. Essentially, it automatically dips the music volume whenever someone speaks and brings it back up in the quiet moments. Most editing software has a built-in tool for this, and learning how to use it will instantly make your videos sound more polished and professional.
Here's my personal rule of thumb: I'll mix the music until it feels just a little too quiet. Then I close my eyes and just listen. If I can understand every single word clearly without straining, but still feel the vibe of the music underneath, I know I've nailed the balance.
Finding Quality Music and Sound Effects
The search for the perfect track can feel overwhelming, especially when you factor in copyright law. The good news is, there are some incredible places to find high-quality, royalty-free music that won’t get your video taken down from YouTube.
Here are a few of my go-to resources:
- YouTube Audio Library: It's completely free, built right into your YouTube Studio, and has a surprisingly massive collection of music and SFX.
- Artlist & Epidemic Sound: These are my top picks for subscription services. The quality is phenomenal, and their libraries are expertly curated, which saves a ton of search time.
- FreeSound.org: This is a massive, collaborative database of sound clips. It's the perfect spot when you need something very specific, like the sound of a closing door or a particular bird call.
Always remember to pick music that actually fits the tone of your video. A high-octane electronic track just feels wrong in a meditative travel video. The score should enhance the story, not confuse it. If you're recording your own audio, it's worth learning some basics to get the best source material; you can find great voice over recording secrets for perfect audio that will make a huge difference.
Simple Fixes for Common Audio Problems
Even with a decent mic, you’re bound to run into issues like a low-level background hum or wildly different volume levels between clips. Don't worry, most of this stuff is easy to fix right inside your editor.
Just about every program has basic audio filters. Look for something called noise reduction or denoiser—it works wonders on that annoying hum from an air conditioner or a computer fan. The key is to apply it subtly so you don't get a robotic, watery sound.
As you get more advanced, you might want to look at more specialized tools. We've actually put together a guide on how to choose the right audio editing software that can help when you're ready to take that step. For now, just focus on the basics: clean up the noise and make sure your dialogue levels are consistent. Your viewers shouldn't have to keep reaching for the volume knob.
Using Titles and Graphics Effectively

Titles and graphics are so much more than just digital window dressing—they're powerful storytelling tools. When done right, they provide crucial context, lend a polished, professional feel to your work, and genuinely help your audience follow along.
Think of them as signposts for your viewer. A simple opening title sets the stage for what’s to come. A well-placed "lower third" can introduce a speaker or hammer home a key talking point. These little touches guide attention and reinforce your message without ever feeling like a distraction.
Core Principles for Clean Graphics
When it comes to graphics, simplicity is your best friend. The real goal here is clarity, not complexity.
You want your text to be instantly readable, which means picking clean, simple fonts. This is not the place for that decorative script font you love—it’ll just be a nightmare to decipher on screen. I always recommend sticking to just one or two fonts to keep things looking cohesive and professional.
Colour choice is just as critical. The text colour needs to have high contrast against the video playing behind it. You can't go wrong with the classic combination of white text with a subtle black drop shadow; it's legible over almost any background.
The best graphics feel like they belong in the video. They should complement the content, not compete with it. If a viewer is distracted by your title card, it’s probably too flashy.
Practical Graphics You'll Actually Use
As a beginner, you don't need to master every single type of graphic. Just focus on a few key types that will immediately elevate your projects.
Here are the three I tell every new editor to start with:
- Opening Titles: Keep it simple. The video title and maybe your name or brand are plenty. A simple fade-in and fade-out animation is all you need to look sharp.
- Lower Thirds: These pop up in the lower part of the screen to give context, like a speaker's name and title. The trick is to leave them on screen just long enough to be read comfortably, but not a second longer.
- Closing Graphics: This is the perfect spot for a call to action. End your video by asking viewers to subscribe, check out your website, or watch another video.
Beyond titles, subtitles are a game-changer for accessibility and reaching a wider audience. It's an extra step that makes a huge difference, and you can learn how to create professional subtitles for your videos without much fuss. It makes your content far more inclusive and easier for people to watch anywhere, even with the sound off.
How to Export and Share Your Final Video
You’ve made it to the final step! After all that hard work, it’s time to package up your masterpiece and send it out into the world. For a lot of beginners, the export screen can feel a bit daunting with all its technical jargon and dropdown menus, but don't worry. Once you understand the key settings, it’s actually pretty straightforward.
Think of it like choosing the right box to ship a package. You need something that protects the contents (your video's quality) without being ridiculously bulky (a massive file size). For pretty much any video you plan to put online, the perfect "box" is the MP4 format. It's the universal standard that works everywhere, every time.
What are Codecs and Containers, Anyway?
Inside that MP4 container is your video, and it has to be compressed using something called a codec. The codec’s job is to shrink your huge project file into something small enough to upload quickly.
For years, the gold standard has been H.264. It gives you a fantastic balance of high quality and small file size, which is exactly why platforms like YouTube and Instagram prefer it. So, when you're staring at a long list of confusing options, just remember this killer combo: Container: MP4, Codec: H.264. Honestly, this pairing will work for 99% of what you need to do.
Your export settings are the final handshake between your creative vision and the platform you're sharing it on. Getting them right ensures your video looks just as good online as it does in your editor.
Nailing the Settings for Different Platforms
While the MP4/H.264 combo is your foundation, different social media platforms have their own "preferences" for things like video dimensions and bitrate. Here’s a quick guide to get your videos looking sharp wherever you post them.
- For YouTube: Stick with a resolution of 1920x1080 (1080p). If you filmed in 4K, you can even export at 3840x2160 (4K) to give viewers the best possible quality. A bitrate between 8-15 Mbps for 1080p video is a solid target.
- For Instagram & TikTok: These are all about vertical video, so you’ll want to set your resolution to 1080x1920. A slightly lower bitrate, somewhere around 5-10 Mbps, is perfect for mobile viewing and helps your videos upload faster.
Getting these final steps right is a crucial skill. The career outlook for film and video editors is looking solid, with employment projected to grow 3% between 2024 and 2034. California's media industry, in particular, has a ton of openings, making it a great place to start building hands-on experience. You can find more details on career paths for video editors on bls.gov.
And don't forget that powerful video is often built on a foundation of great audio. If you're looking to level up your sound, check out these 5 easy steps to get started with creating audio content.
Editing shouldn't feel like a chore. With Trebble, you can edit your videos just by editing the text transcript. Our platform automatically removes filler words and awkward silences, letting you focus on your story. Start for free and see how easy editing can be.