How to Record a Guided Meditation

How to Record a Guided Meditation
Written by Sonia Khanna 6 Minute Read
Guided meditations significantly reduce stress and enhance relaxation through their meticulous instructor-led process. It is important for your guided meditation to sound clean, concise, and crystal clear in order for it to provide listeners comfort and the utmost focus. With just a computer, headphones, and the platform Trebble, you will be able to create guided meditation successfully, efficiently, and affordably. In this article, we will walk you through the simple step-by-step process of creating your very own audio-guided meditation.

Step 1: Craft Your Meditation Script
When crafting your meditation script, there are several key points to consider. Ensure your dialogue serves a purpose with the goal of providing the listener with a specific outcome; some examples can be to relax listeners, heal them from trauma or open their third eye. Having planned pauses between certain words and phrases will allow for better reflection and understanding for your audience. Do not underestimate the power of brief silences. Write your meditation cautiously, allowing room for listeners to utilize their imagination and go beyond the scope of your script will amplify their experience
Step 2: Log in to the Trebble Platform
If you do not have a Trebble account, not to worry, you can easily create an account with Trebble for absolutely no cost. Create an Account with Trebble Here. Click the “Get Started for Free” button.

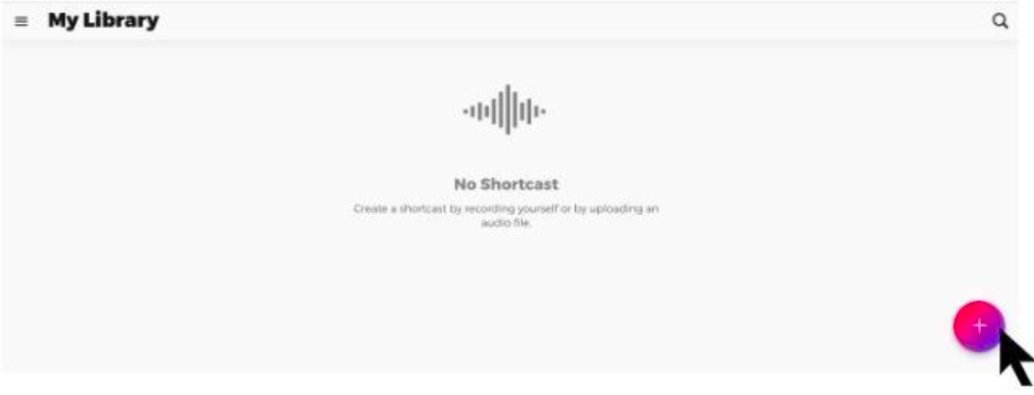
Step 3: Click the Plus Icon to Begin
Once you have created an account with Trebble, you will be prompted to create content. Click the multicolored plus sign symbol to begin.
Step 4: Some Housekeeping Before Recording
First thing first, you want to verify that your microphone is correctly plugged in. After that, make sure that Trebble is listening to your microphone. To do so, click on the “Settings'' button in the top right corner.
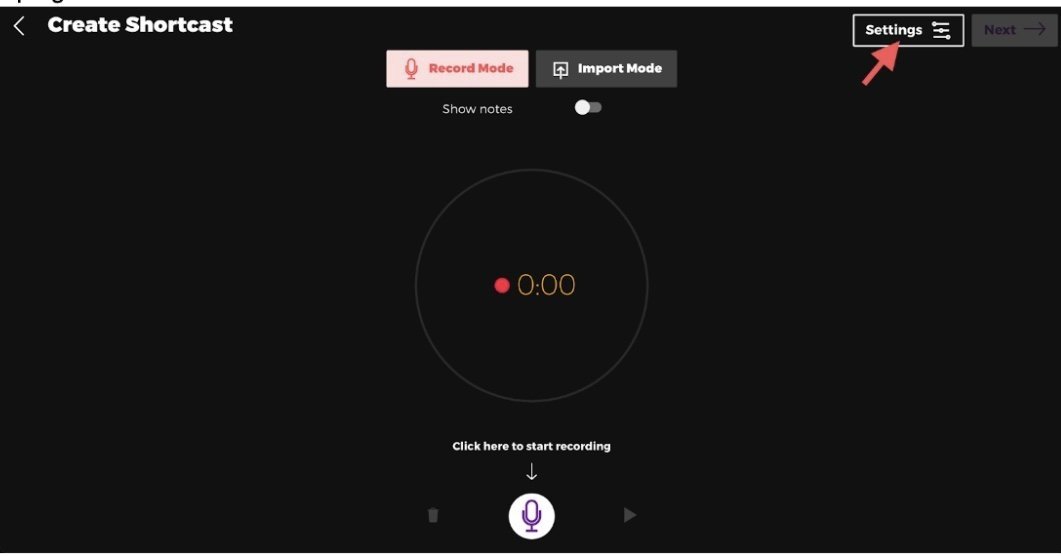
Use the provided dropdown to select the microphone input you want to use and click on “Save” to confirm your changes

Step 5: Add Your Notes or Script To Make Recording Easier
Do you have a script you want to use during your recording? Click on the “Show notes” toggle button. This will display a text field where you can enter your script to help you during your recording.

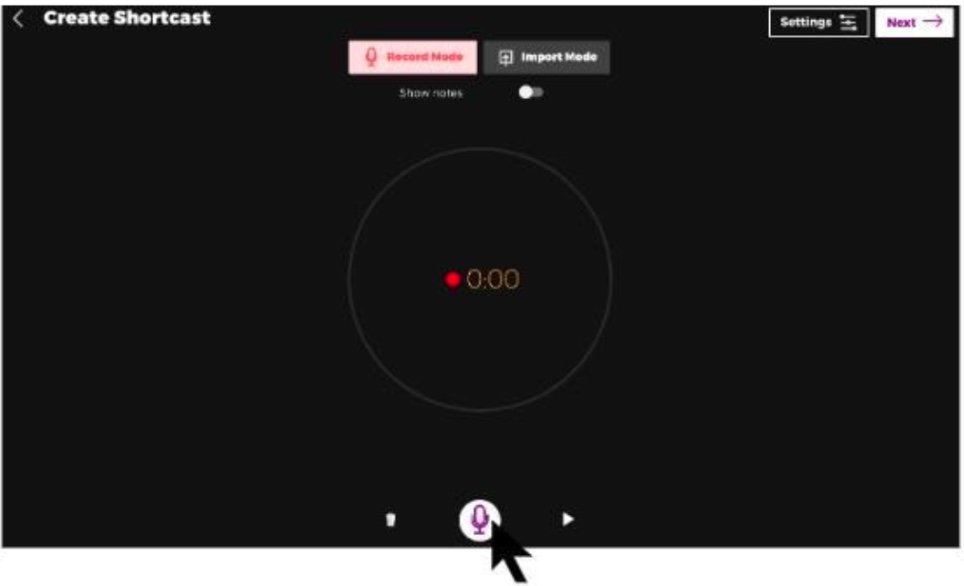
Step 6: Begin Recording by Clicking the Microphone Icon
To begin recording, click the microphone icon to start.
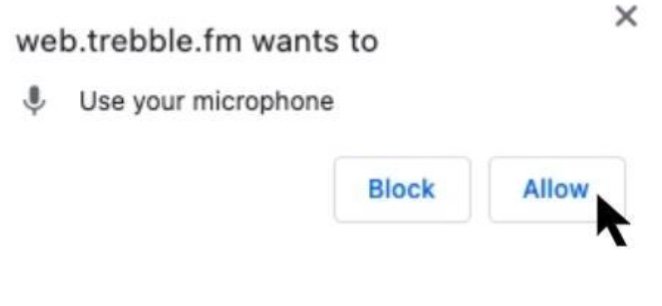
You’ll be asked for permission to use your microphone in order for Trebble to record. Click on the “Allow” button to give permission.
While you are recording, if you make a mistake or you stumble on a word, don’t stop your whole recording. Instead, take a pause, gather your thoughts and resume speaking starting from the sentence where you made a mistake. Once you are done, stop the recorder and listen to the whole recording by clicking on the play button. Ignore the little mistakes you’ve made along the way. We will clean up all those little mistakes in the next step. You can record as many times as you want so if you are not happy with your recording, make another one until you are satisfied. You have as many times to record as you would like, so take your time.
Once you are done and happy with your recording, click “Next"
Step 7: Transcribe Your Audio
To help you easily make changes to your audio recording, Trebble transcribes it to text. Transcribing your audio will allow you to efficiently edit your guided meditation. To start the transcription process, choose the closest language to the one you are using in your recording to get the most accurate transcription, and then click on the button “Transcribe”.
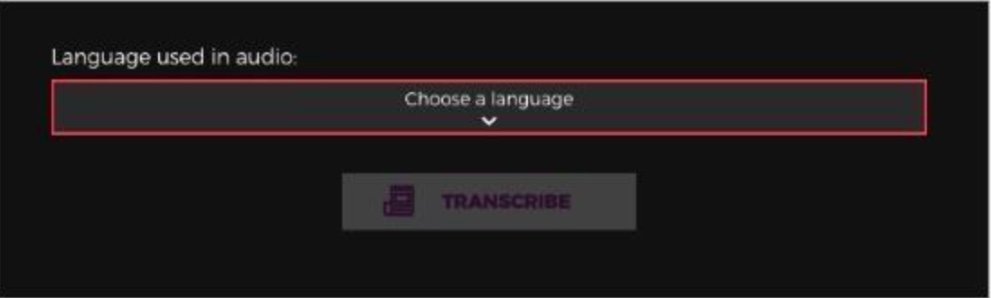
Trebble offers 37+ languages and dialects to choose from.
Step 8: Edit Your Audio
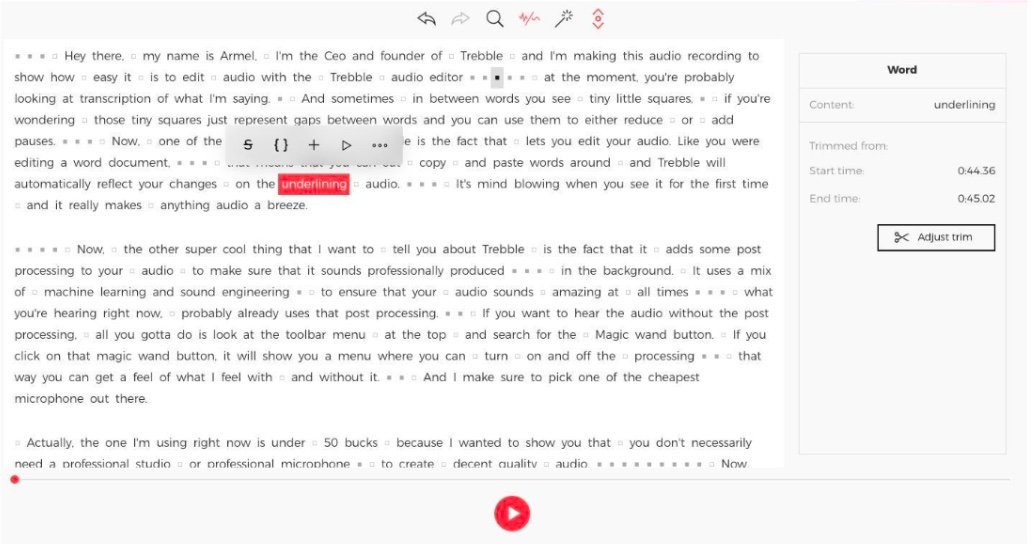
Once the transcription is completed, Trebble will display the text transcription of your audio. This is where the magic happens. You can now visually see your audio. Delete, cut, copy and paste words around and Trebble will automatically reflect your changes to the underlying audio. You can edit your audio like a Word document. Through Trebble’s transcription, you can add background audio, insert audio, play from a certain timestamp, cut, copy and save as a clip. The small squares between words and phrases are pauses, you may choose to delete pauses or add more to enhance your meditation.
Step 9: Add Music and Sounds
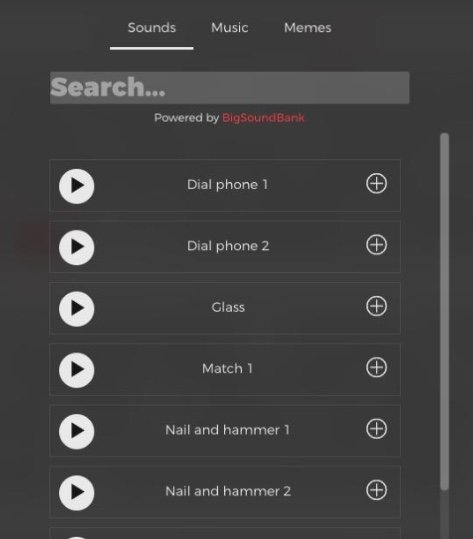
Additionally, Trebble offers a wide variety of music and sounds to complement your audio. For your guided meditation, it may be beneficial to choose background audio from Trebble’s Deep Focus category. Select the text where you would like to insert audio and click the plus icon.

You can test out different audios by clicking the play button and then choose which is the best suitable music for your guided meditation.
Step 10: Noise Cancellation Tool
Trebble offers various features that will take your audio to the next level. The noise cancellation tool will eliminate the background noise in your audio, allowing your listeners to fully focus on your meditation without distractions. When listeners can hear background noise such as fans, alarms, doorbells, dog barking, etc, it can take them out of their relaxation state, so it is important to utilize this feature.

Step 11: Magic Sound Enhancing
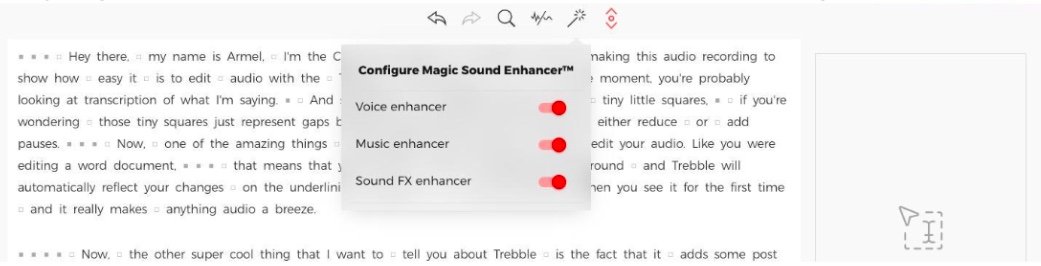
Trebble’s Magic Sound Enhancer comprises three tools, voice enhancer, music enhancer, and sound FX enhancer, that are all automatically applied to your content. You may adjust and turn them on/off according to your preference. It is recommended to utilize each of these features to clean and polish your audio, especially for guided meditation, where we want to ensure everything is clear for the audience to avoid confusion and misunderstandings.
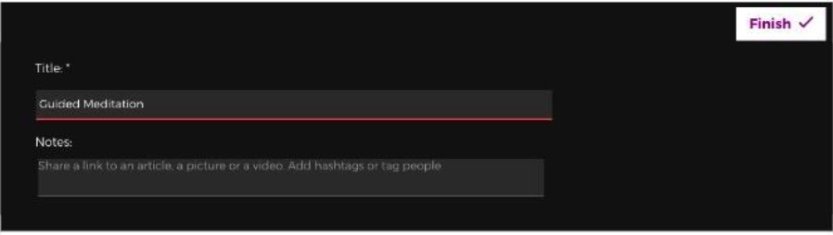
Step 12: Title Your Audio
Once your guided meditation is edited, the next step is to download and export it. Once you click the Next button after editing, you will be prompted to give your audio a title. In addition, you can share a link to an article, picture, or video in the “Notes” section. Listeners will be able to view all that information when they are listening. Listeners will be able to view all that information when they are listening. Give it a name and click finish.
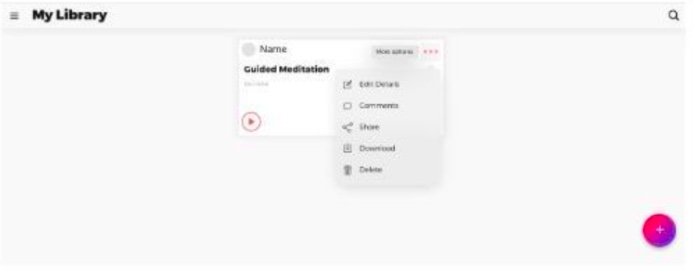
Step 13: Save to Your Trebble Library
Your audio will now be saved to your Trebble library where you will have the options to edit, comment, share, download or delete. No one else has access to your library.
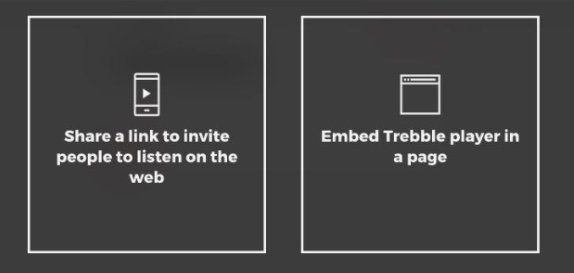
Step 14: Choose How You Want to Distribute Your Guided Meditation
If you choose to download, your content will open on your laptop through a secondary source. If you choose to share, you have two options, one is to share a link to invite people to listen to your guided meditation on the web.
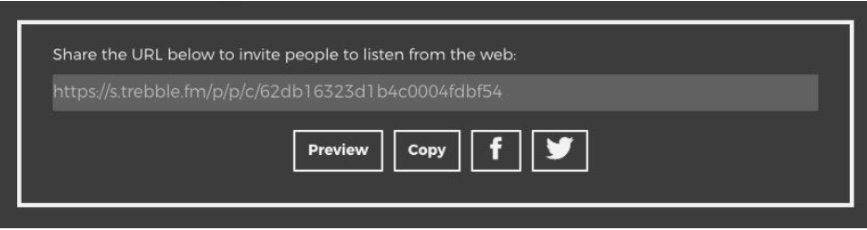
By choosing the share a link option, you will receive a personalized URL. With this URL, you will have the ability to share your guided meditation with whomever you would like. This is the recommended pathway for distributing your content.
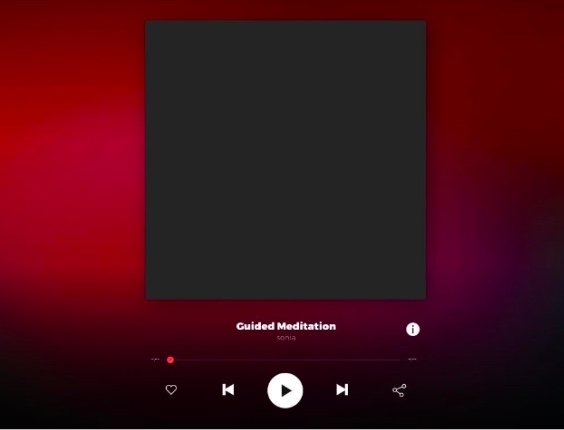
The second option is to embed the Trebble player on a page.

With this method, you can listen to your guided meditation through the Trebble platform.
Step 15: Share & Enjoy Your Guided Meditation
Now that you have discovered the various ways to distribute your audio, you may share your guided meditation through newsletters, social media, YouTube, and many more platforms. It is important to be confident in your finished product and take pride in your work. We hope these 10 easy steps will allow for your meditation journey to flourish.
If you have any questions or require assistance, please contact hello@trebble.fm